

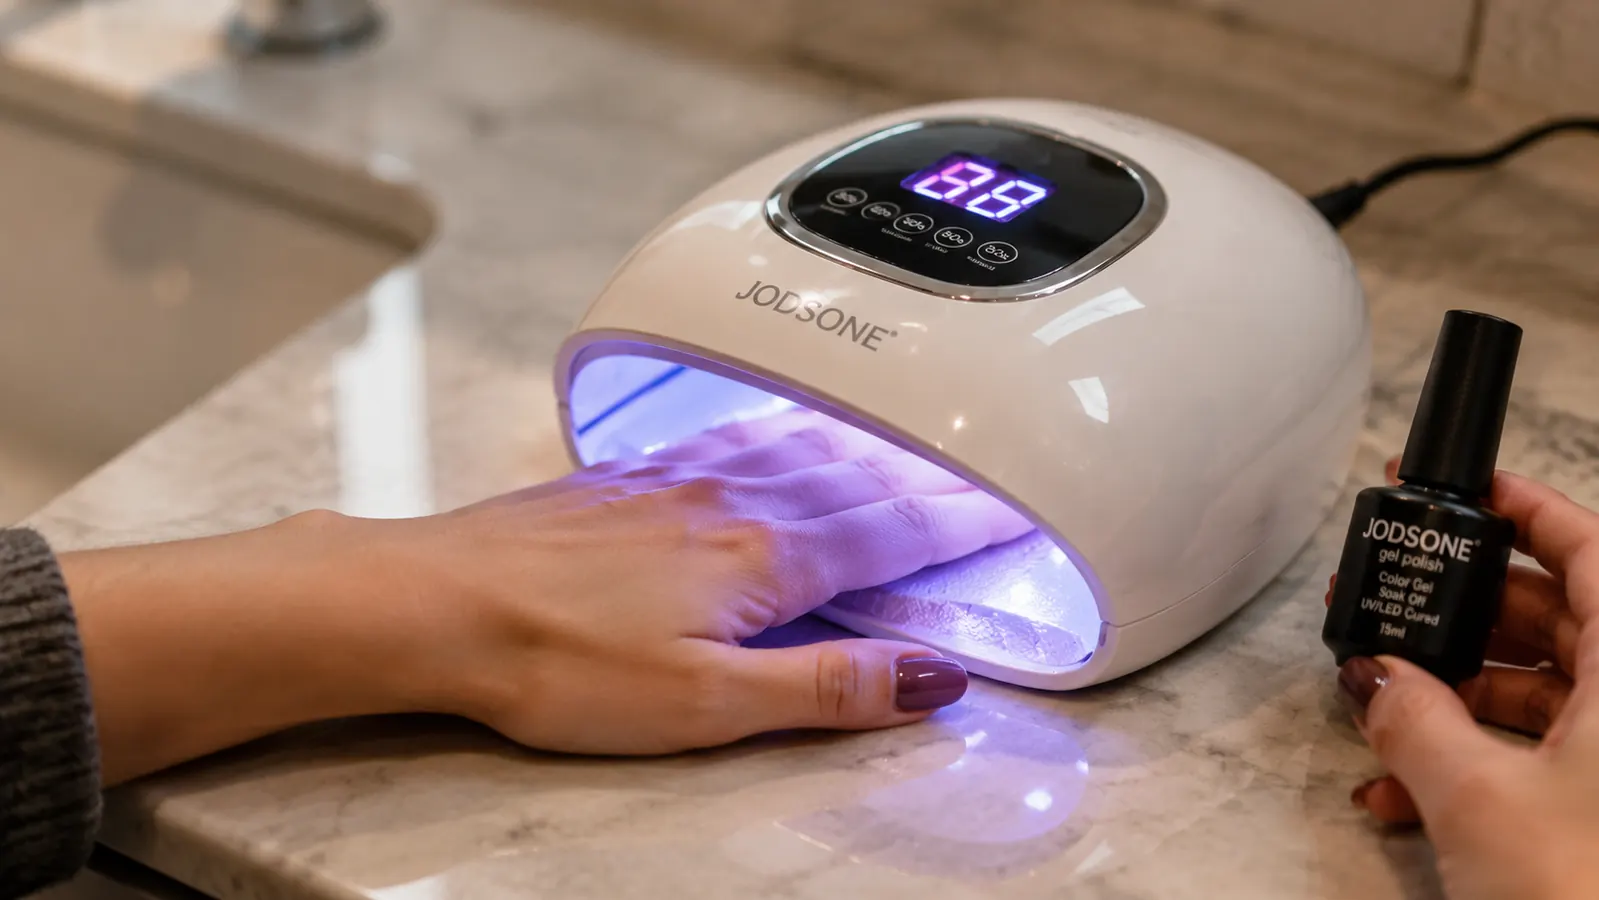
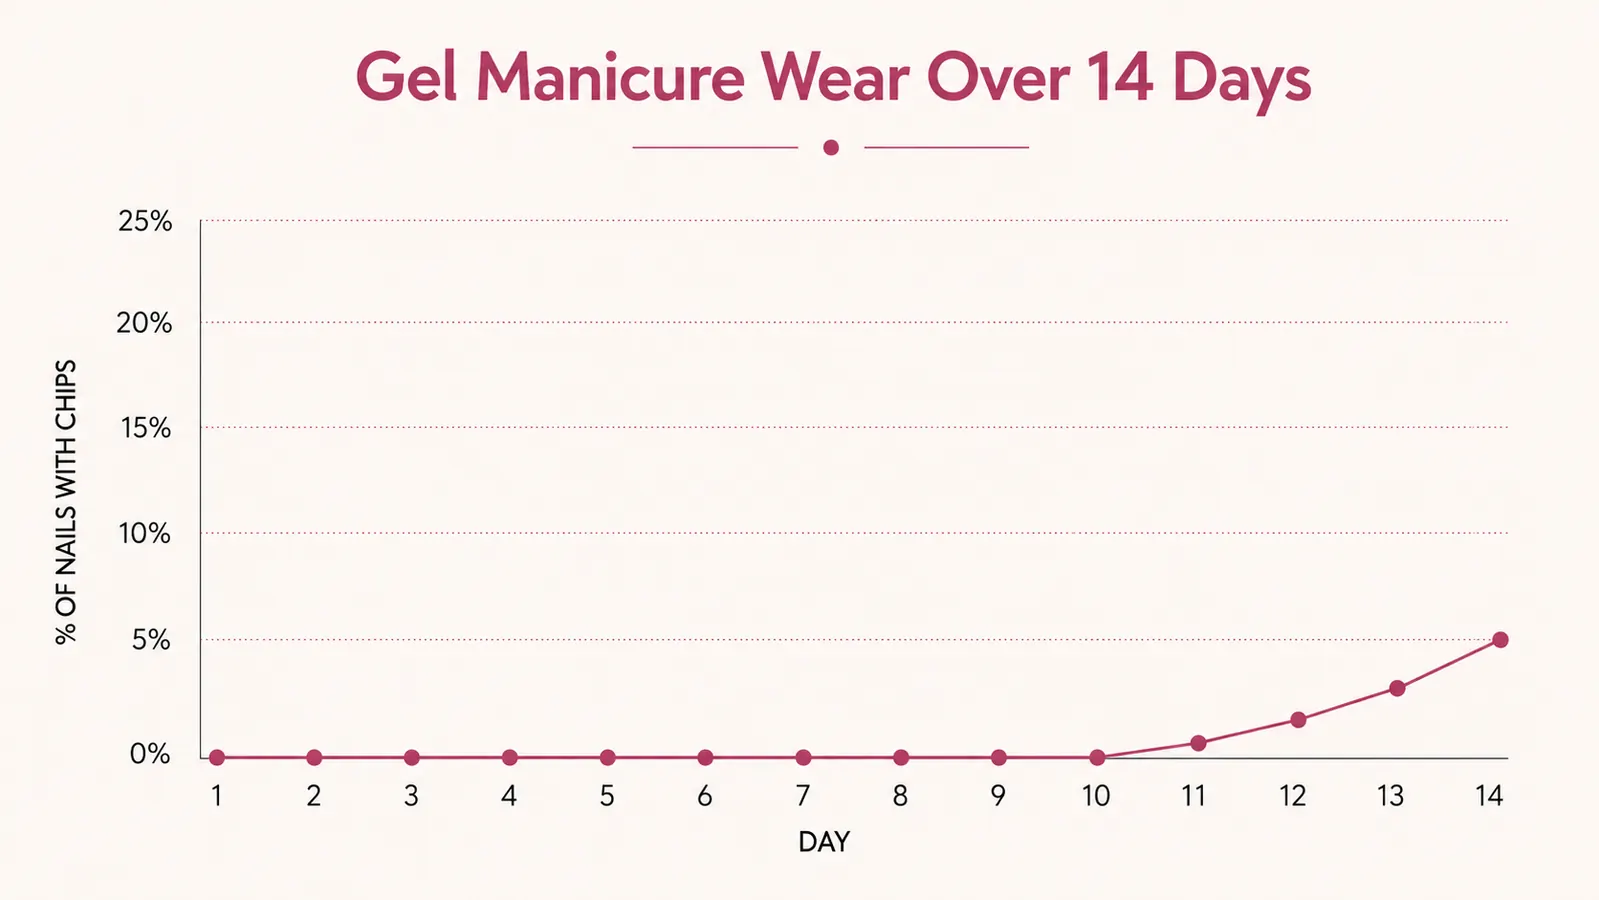
My gel manicures used to chip by day four. I'd blame the polish, buy a different brand, and get the same result. Turns out the polish was never the problem. It was everything I was skipping before I even opened the bottle. Once I slowed down and did the prep work right, using the JODSONE gel kit that comes with its own UV lamp, I started getting a full two weeks out of a single manicure, sometimes closer to sixteen days before I saw any real lifting at the tips.
This isn't a fancy routine. It's about six extra minutes of prep that most tutorials rush past because it's not the satisfying part. But those six minutes are the entire difference between gel that peels off in a sheet on day five and gel that has to be filed off because it genuinely won't budge. Here's exactly what I do, in order, every single time, plus what I keep on hand before I even sit down.
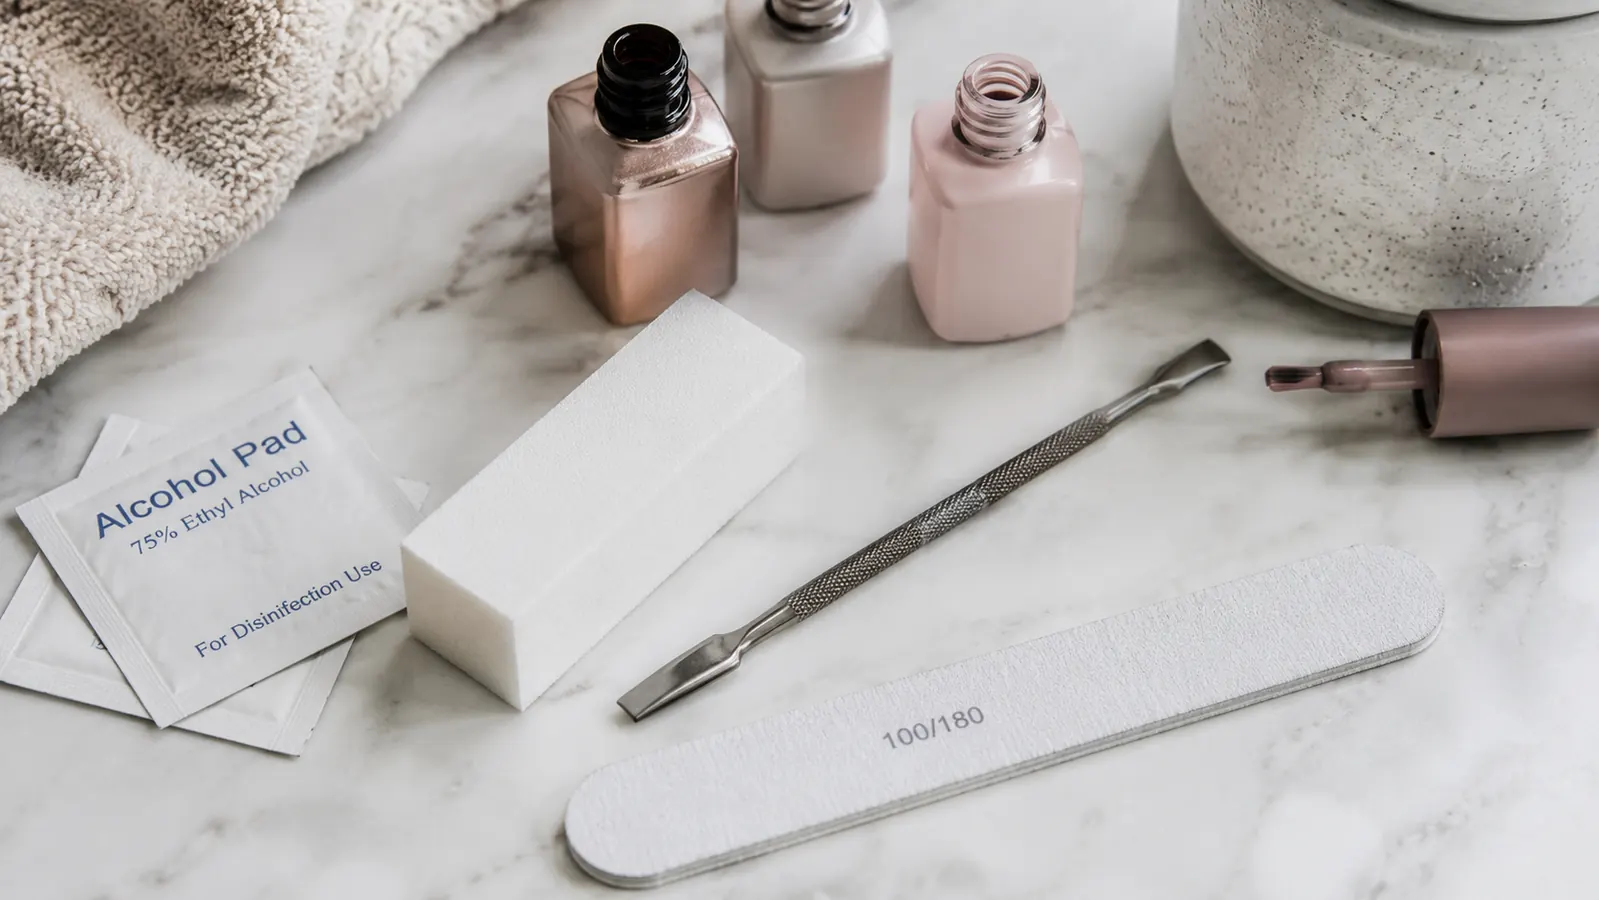
You don't need much beyond the kit itself. A metal or rubber cuticle pusher, a fine-grit buffer block, rubbing alcohol, and a stack of lint-free wipes cover the prep side. Everything after that, the base coat, color, top coat, and the lamp to cure it all, comes in the JODSONE box, which is honestly why I switched to it. I used to have three different brands sitting on my counter and never remembered which top coat matched which base, or whether a particular color even needed the extra cure time. Having one system with matched chemistry removed a whole category of guesswork, and the lamp fits both hands at once, so I'm not sitting there for twice as long curing one hand and then the other.
Everything you need is in one box
The JODSONE kit comes with the lamp, base coat, top coat, and 20 gel colors, so you're not piecing together separate products from three different brands. That alone cut my setup time in half.
Amazon Check Today's Price on Amazon →Step 1: Strip your nails completely before you touch a polish bottle
Before anything else, wash your hands with plain soap and dry them fully. This sounds too basic to matter, but hand lotion, cuticle oil residue, and natural nail oils are the number one reason gel polish doesn't grip. I keep a small bottle of rubbing alcohol and a stack of lint-free wipes right next to my kit. After washing, I swipe every nail with an alcohol-soaked wipe and let it air dry for thirty seconds. Skip this and you'll see the polish start lifting at the edges within two or three days, no matter how good the brand is.
If you're removing old gel polish first, do not peel it off. I know the temptation is real when a corner starts to lift, but peeling takes layers of your natural nail with it, which is why some people say gel manicures 'ruin' their nails. It's not the gel doing the damage, it's the peeling. Soak cotton pads in acetone, press them onto each nail, wrap in foil, and wait ten minutes before gently sliding the old polish off with an orange stick, not a metal tool that can gouge the nail plate. Your nail bed should look smooth underneath, not thin or ridged. If it looks rough or peely, give your nails a bare week before starting the next gel set so they have time to recover, and rub in cuticle oil daily during that break. Skipping this recovery week is how thin, weak nails happen, not the gel process itself.
Step 2: Push back cuticles and lightly buff the nail surface
Use a metal or rubber cuticle pusher, not scissors, to gently push cuticles back after a warm-water soak. You're not cutting anything unless there's a hangnail. Then take a fine buffer block and go over the top of each nail with light, even strokes, just enough to remove the shine. You're not sanding the nail down, you're roughing up the surface microscopically so the gel base coat has something to grab onto. I learned this the hard way after a manicure that lasted exactly two days because I'd skipped buffing entirely, convinced my nails were already smooth enough.
Wipe away the dust with a dry lint-free wipe, then go back over each nail one more time with the alcohol wipe. Any oil, dust, or residue left behind at this stage shows up as a weak spot in the finished manicure, usually right where you'll notice it first, the tip of the nail where it takes the most daily wear. I do this final wipe right before I pick up the base coat bottle, not five minutes earlier, since oils from your skin resettle fast.
Step 3: Apply the base coat in thin layers and cure fully
Cap the free edge of each nail, meaning run the brush along the very tip so the polish wraps slightly underneath. This one habit prevents the classic tip-chip that shows up around day six. Apply the base coat in a thin, even layer, thinner than you think you need. Thick layers don't cure properly all the way through, and uncured gel underneath is soft and prone to peeling even if the top layer looks hard and glossy.
Cure under the JODSONE lamp for the full time the kit recommends, which is 60 seconds for base and top coat and slightly longer for darker or shimmer colors. Don't cut the timer short because your nails 'look' done. Under-cured gel feels tacky and dents easily with a fingernail test, so if yours does that, go back under the lamp for another 30 seconds before moving on to color. Rushing this step is the second most common reason people end up with an early chip, right behind skipping the alcohol wipe.
Step 4: Build color in two thin coats, not one thick one
This is where most people undo all their prep work. One thick coat of color looks fully opaque wet, but it cures unevenly and chips fast because the surface hardens before the layer underneath does. Two thin coats, each cured separately under the lamp, give you a smoother, harder, more even finish every time. I go from cuticle to tip in three strokes, one down the center, one on each side, capping the free edge every time so the color wraps the tip the same way the base coat did.
If you're using a lighter shade from the JODSONE 20-color set, like a pale pink or nude, you may need a third thin coat to get full opacity, since sheer pigments always need an extra pass. That's normal and still faster than one gloppy coat that takes forever to cure and chips within the week. Deeper reds and darker tones in the same set usually cover fully in two coats, so you can go a little quicker there.
Step 5: Seal with top coat and wipe off the tacky layer
Apply the top coat the same way, thin and even, capping the tip. Cure for the full recommended time. Gel top coats leave a slightly sticky residue on the surface after curing, which is normal and not a sign anything went wrong. Wipe each nail with an alcohol pad or the cleanser wipe that comes in most kits to remove that tacky layer and reveal the true glossy finish underneath. If you skip this wipe, that stickiness attracts lint and dust for the first day or two, which dulls the shine faster than it should.
Last step, and it's an easy one to forget, rub a drop of cuticle oil into each nail bed once everything is cured. Gel manicures can dry out the surrounding skin over two weeks of wear, and keeping the cuticle area hydrated actually helps the polish itself look better for longer, since dry, cracking cuticles are usually where lifting starts first. I keep a small rollerball of cuticle oil in my bag and touch it up once a day for the first week.
Common Mistakes That Cut a Manicure Short
Curing for less time than the kit calls for is the single biggest one. It's tempting to eyeball it, especially on the fourth or fifth nail when you're ready to be done, but a soft, under-cured layer under a hard top coat is a ticking clock. It might look fine on day one and start lifting in sheets by day four. If you're ever unsure whether a nail cured fully, press a fingernail gently into the edge. It should feel completely solid with no give.
Applying polish too close to the cuticle is another one. Leaving a tiny gap, less than a millimeter, actually helps the manicure last longer, because polish that touches skin tends to lift as the cuticle grows and the skin naturally sheds. It looks slightly less filled-in at first, but it holds up far better than polish flooded right up to the skin line. The same goes for getting product on the surrounding skin. Clean up any overflow with an angled brush dipped in acetone before you cure, not after, since cured gel on skin is much harder to remove cleanly.
What Else Helps It Last the Full Two Weeks
Wear gloves for dishes and cleaning. Hot water and dish soap are harsh on any gel manicure, salon or DIY, and this is the single biggest lifestyle factor in how long yours lasts. I also apply cuticle oil every night before bed, not just on manicure day, since a well-moisturized nail bed keeps the seal at the edges intact longer. If you notice the tiniest bit of lifting at one tip around day ten, don't pick at it. Dab a little top coat on just that nail and cure it again. That single fix has bought me an extra four or five days more than once, and it takes about ninety seconds.
Avoid using your nails as tools. Opening cans, scratching off stickers, and prying at things is how gel manicures actually fail, more often than the polish itself failing. It's not glamorous advice, but it's the difference between a manicure that makes it to week two and one that needs a touch-up by day seven. I also try not to soak my hands for long stretches, like an extended bath, since prolonged water exposure can work its way under even a well-sealed edge over time.
When it's finally time to remove, resist the urge to peel again. Acetone soak, foil wrap, ten minutes, gentle push with an orange stick. If a section still won't budge, give it another five minutes rather than forcing it. Your nail bed will thank you the next time you start this whole routine over.
The polish was never the problem. It was the six minutes of prep I kept skipping to get to the fun part.
Get the kit that makes this routine possible
You need a real UV lamp, a proper base and top coat, and pigmented color in one place. The JODSONE kit covers all three for less than a single salon visit.
Amazon Check Today's Price on Amazon →